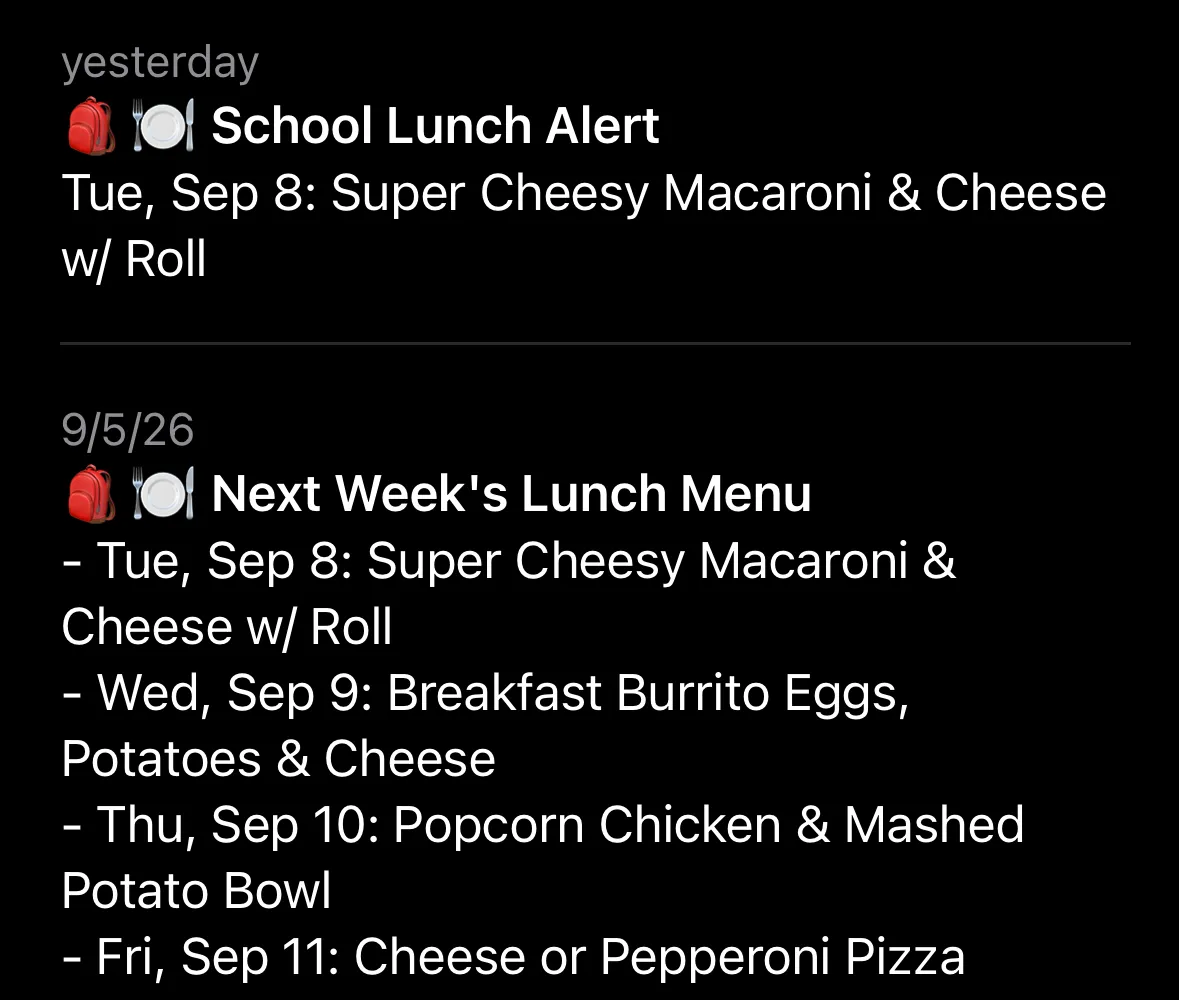
My kid likes to eat hot lunch at school and is a very picky eater. Every night, we need to go look up tomorrow’s lunch to figure out if she’ll want to eat it. I bet everybody usually sticks the menu on their fridge. But since I’m a nerd, I set up a daily notification with tomorrow’s lunch.
This post walks through how I did it.
Step 1: Get ntfy
ntfy is a useful and free push notification service. It lets you subscribe to topic(s) and it will notify you anytime something gets posted on your topic(s).
After downloading the app, pick a topic name. You might choose a topic like {school}_lunch_menu where {school} is the name of your school.
Step 2: Sign up for Cloudflare
You’ll have to sign up for a Cloudflare account. We’ll use Cloudflare’s “workers” to run small scripts with a generous free tier.
Step 3: Install Node.js and NPM
To build a Cloudflare Worker, you’ll need Node.js on your computer. It comes bundled with npm (Node Package Manager).
Head over to nodejs.org and download the LTS (Long Term Support) installer for your computer.
Run the installer and click through with the default settings.
To verify it worked, open your terminal and run node -v and npm -v.
Step 4: Get the data
Our district’s menu comes out as a calendar PDF. It would be annoying to try to retype the whole menu by hand. I automate it by uploading the menu with instructions to an AI chat bot.
These are the instructions:
**Role:** You are a data extraction assistant specializing in converting unstructured calendars into clean JSON.

**Task:** Please analyze the attached school lunch calendar PDF and extract the lunch menu into a structured JSON format.

**Output Requirements:**

1. **Format:** A single JSON object where the **key** is the date in `YYYY-MM-DD` format and the **value** is the main entree (e.g., "Chicken Nuggets" or "Bean & Cheese Burrito").
2. **Date Context:** Use the Month and Year explicitly stated on the calendar (e.g., if the calendar says "May" and the year is 2026, the first day should be "2026-05-01").
3. **Clean Data:** - Remove any extra text like "Choice of milk," "Fruit bar," or "Side of corn." Only include the main entree.

- If a day has no meal listed (weekends or holidays), omit that key from the JSON entirely.
- If the text spans multiple lines in one cell, combine it into a single line (e.g., "Hand rolled\nBean Burrito" becomes "Hand rolled Bean Burrito").
- The text should be in title case

4. **No Prose:** Output **only** the raw JSON block. Do not include introductory text or explanations.

**Example Target Structure:**
{
"2026-05-01": "Hand rolled Bean & Cheese Burrito",
"2026-05-04": "Chicken Nuggets",
"2026-05-05": "Turkey Tacos"
}
Step 5: Write the script
This script has lived two different lives and a few enhancements. It lived for a year as a human-written Python script running on a server. After expelling server maintenance from my list of chores, I asked AI to convert it to Javascript that I could run on Cloudflare Workers.
How it works:
- The script runs every day.
- If the day is Sunday-Thursday, it creates a notification for the following day’s lunch.
- If the day is Saturday, it sends out a notification with all the lunches for following week.
Configuration bits:
TIMEZONE: If you’re in a different timezone, you will probably want to update this in the script.NTFY_TOPIC: This is an environment variable and comes from the topic name from step 1,{school}_lunch_menu.
The script:
import menu from "./menu.json" with { type: "json" };

const TIMEZONE = "America/Los_Angeles";

// Helper function to format dates cleanly
function getFormattedDates(dateObj) {
  const year = dateObj.getFullYear();
  const month = String(dateObj.getMonth() + 1).padStart(2, "0");
  const day = String(dateObj.getDate()).padStart(2, "0");

  const friendly = new Intl.DateTimeFormat("en-US", {
    weekday: "short",
    month: "short",
    day: "numeric",
  }).format(dateObj);

  return { iso: `${year}-${month}-${day}`, friendly };
}

export default {
  async scheduled(event, env, ctx) {
    const NTFY_TOPIC = env.NTFY_TOPIC;

    // Get current time in Pacific Time
    const now = new Date();
    const ptString = now.toLocaleString("en-US", { timeZone: TIMEZONE });
    const ptDate = new Date(ptString);

    const dayOfWeek = ptDate.getDay(); // 0 = Sunday, 1 = Monday ... 6 = Saturday

    let message = "";
    let title = "School Lunch Alert";

    if (dayOfWeek === 6) {
      // It is Saturday: Grab the menu for next week
      title = "Next Week's Lunch Menu";
      let weeklyMenu = [];

      // Loop from Monday (2 days from Sat) to Friday (6 days from Sat)
      for (let i = 2; i <= 6; i++) {
        const targetDate = new Date(ptDate);
        targetDate.setDate(ptDate.getDate() + i);

        const { iso, friendly } = getFormattedDates(targetDate);

        if (menu[iso]) {
          weeklyMenu.push(`- ${friendly}: ${menu[iso]}`);
        }
      }

      // Join the array into a multiline string
      if (weeklyMenu.length > 0) {
        message = weeklyMenu.join("\n");
      }
    } else {
      // It is Sunday-Thursday: Grab the menu for tomorrow
      const tomorrow = new Date(ptDate);
      tomorrow.setDate(ptDate.getDate() + 1);

      const { iso, friendly } = getFormattedDates(tomorrow);

      if (menu[iso]) {
        message = `${friendly}: ${menu[iso]}`;
      }
    }

    // If we built a message (either daily or weekly), send it
    if (message) {
      const response = await fetch(`https://ntfy.sh/${NTFY_TOPIC}`, {
        method: "POST",
        body: message,
        headers: {
          Title: title,
          Tags: "school_satchel,plate_with_cutlery",
          Priority: "3",
        },
      });

      if (response.ok) {
        console.log(`Sent alert:\n${message}`);
      } else {
        console.error(`Failed to send alert: ${await response.text()}`);
      }
    } else {
      console.log("Checked dates: No meals found.");
    }
  },
};
Step 6: Create the script
Open a terminal on your computer and navigate to a directory you want the script to live in and initialize a new Worker project.
# Move to my documents
cd ~/Documents

# Create a new project
npm create cloudflare@latest -- lunchbot-js
You’ll be asked to answer a few questions:
- What would you like to start with?
Hello World example
- Which template would you like to use?
Scheduled Worker (Cron Trigger)
- Which language do you want to use?
JavaScript
- Do you want to add an AGENTS.md file…?
No(or Yes, doesn’t matter)
- Do you want to use git for version control?
Yes
- Do you want to deploy your application?
No
Step 7: Add your code
cd into your new project or open the directory with your code editor of choice.
Update the src/index.js file with the code from Step 5: Write the script.
Inside the src directory (folder) create a new file named menu.json. Copy+paste the data from Step 4: Get the data. The script will read the menu from this file.
Update the cron triggers in the wrangler.jsonc file. This is the new trigger data:
"triggers": {
		// Schedule cron triggers:
		"crons": [
			// 1. Runs Sun, Mon, Tue, Wed, Thu evenings (PT)
			// (This is 1:00 AM UTC on Mon, Tue, Wed, Thu, Fri)
			"0 1 * * 1-5",
			// 2. Runs Saturday mornings at 8:30 AM summer / 7:30 AM winter (PT)
			// (This is 3:30 PM UTC on Saturday)
			"30 15 * * 6"
		]
	}
Deploy the script:
npm run deploySet the NTFY_TOPIC environment variable:
npx wrangler secret put NTFY_TOPIC

# You will be prompted to enter the '{school}_lunch_menu' topic you created.
🤞 it should all work!
Step 8: Local testing
If something failed, or you want to test it out on your computer, you might want to test it on your computer.
Set the local environment variable by creating a file named .dev.vars that has this:
NTFY_TOPIC="{school}_lunch_menu"Start the local dev server:
npm run devYou can press b on your keyboard or navigate to the url you see in the CLI window. It will look like http://localhost:8787.
On that page, it’ll have instructions on how to trigger your dev worker.
To test the scheduled handler, ensure you have used the “–test-scheduled” then try running “curl $SOME_URL”.